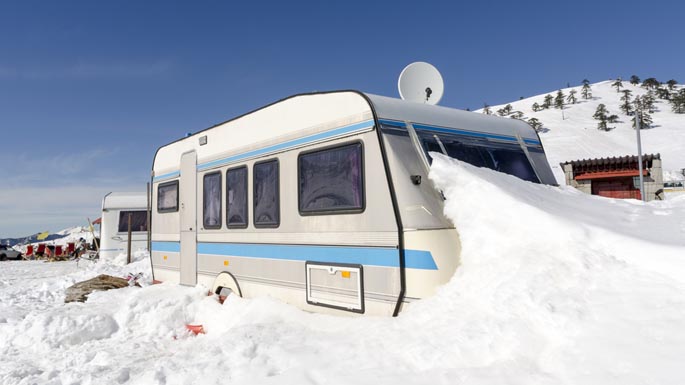
HOW TO WINTERIZE YOUR RV: A STEP-BY-STEP GUIDE
As the temperatures drop, your RV needs a little extra protection from the cold. Water expands when it freezes, which can lead to leaking or burst pipes in your RVs water supply or drain lines. The main objective of winterizing is to replace the water in your lines with antifreeze, which will remain in liquid form even at very low temperatures.
RV repair facilities will professionally winterize your RV for you, but you can save money by doing it yourself. For this project, you’ll need:
- A few gallons of marine/RV antifreeze—exact amount varies by make and model
- A water-heater bypass kit if not already installed
- A cleaning wand (see #2 below)
- Water pump converter kit or tubing to connect to pump inlet valve
- Hand tools to remove drain plugs
- A bucket
STEP 1: REMOVE OR BYPASS WATER FILTERS
An RV owner’s first step is to remove or bypass any inline water filters since antifreeze can damage them. Remember: most RV insurance policies do not cover damage from frozen water, since it’s avoidable. While working on the filters, check to see if they need replacement. If they do need replacing, you have all winter to find new filters at the best price.
To find these filters, consult your owner’s manual. They are in different places in different RVs: under the kitchen sink, in a kitchen cabinet, in the wet bay, at the spigot, at the convenience center, in a rear storage area, and even near the control panel.
STEP 2: DRAIN THE TANKS
First, drain the freshwater holding tank. This tank is accessible below your RV near an exterior wall and is usually centrally located so that it can deliver water to sinks and showers. Simply find the valve and open it. This water is potable and it’s okay if it drains onto the ground, though if you are in an RV park your neighbors may not appreciate it.
Next, locate the drain plugs or valves for the black and gray water tanks. These tanks are usually near an exterior wall underneath your RVs bathroom. The drain valves should be easy to locate from there.
Letting waste water sit in those for an extended period of time not only increases the risk of water freezing, but it lets potential harmful bacteria grow unimpeded. The tanks for black and gray water should only be drained at an approved dumping facility. Be sure your drain hose is properly attached at both ends before you start draining. It’s an easy mistake to make, but one you’ll instantly regret.
Drain the black water tank first. If your RV does not have its own tank-flushing system, use a cleaning wand to flush the black water tank. Products like Flush King also help flush out both waste water tanks. Once you’re finished, it helps to lubricate the termination valves with WD-40 for future use.
Draining the black water tank first allows the gray water to flush out the drain hose, keeping it cleaner for future use and storage.
STEP 3: DRAIN WATER HEATER AND LINES
DRAINING THE WATER HEATER
The water heater should not be hot or under pressure when it is drained, so turn the water heater off and let it cool. You don’t want to be scalded.
There may be multiple places to turn off your water heater. It’s best to turn them all off. One power switch is on the water heater itself, accessible from the outside of the RV. The other is on or near the control panel in your RV.
Next, shut off the water that is going into the water heater. There is usually a valve within a foot or two of where the pipe or hose enters the water heater.
At this point, you can open the pressure relief valve. Wait until water stops running from the PRV before moving on, and leave the valve open.
Now, get a bucket. The bucket is important. Because it’s time to drain the water heater.
Before draining, some experts recommend turning on a faucet or two so that “hot” water is flowing out of it—this reduces the pressure within the water heater tank. Slowly unscrew the drain plug to begin draining the unit. Use a bucket to catch the first few gallons of water that come out. Fully remove the plug to allow the water heater to drain completely.
While it’s draining, check the water in the bucket for rust, sediment, or scaling. If you see these things, you might want to flush your water heater again, replace your anode rod, or start saving for a new water heater.
If your water heater is draining slowly, removing the anode rod speeds up the process. Often the anode rod is attached to the drain plug, so it gets removed either way, but if it isn’t locate it. Remove it and check it for scaling or corrosion. If the anode rod appears heavily corroded, it’s time to replace it. The anode rod is a sacrificial rod that corrodes before the interior of the water heater does. If the rod is damaged, your water heater will soon start corroding, which is irreversible.
DRAINING YOUR RV'S WATER LINES
Open all faucets and locate and open the low-point drain plugs on the system. Flush the toilet to remove water in the tank. If you’ve got an outdoor shower, make sure to drain it as well.
Some people use the RV’s 12V water pump to force the water out completely. If you’re using the pump, be sure to turn it off as soon as soon as the water is out to keep the unit from getting damaged.
Once the water is drained, recap all drains and close all faucets.
STEP 4: BYPASS THE WATER HEATER
You’re about to add antifreeze to your plumbing system, but filling your water heater would waste six to ten gallons of antifreeze. It also makes the dewinterizing process more difficult if the hot water tank isn’t bypassed.
Many RVs come with a bypass installed, but if yours doesn’t have one, visit an RV repair facility to have one installed.
STEP 5: ADD ANTIFREEZE
You’re ready to pump the antifreeze in your system, which will protect your plumbing when the thermometer dips below freezing. There are two ways to do this:
- Install a water pump conversion kit
- Use the inlet side of the water pump
Water pump conversion kits will come with instructions on how to use them. If using the inlet side of the water pump, disconnect the line coming from the freshwater tank and attach tubing that connects to the inlet. Put the other end of the tubing into a container of non-toxic marine/RV antifreeze. Then turn on the pump, which will pressurize the plumbing system.
Starting with the closest faucet to the pump, slowly open the hot and cold faucets until antifreeze comes out. Once you see antifreeze, close the faucet. Do this to all faucets, working from closest faucets to pump to the farther faucets. As you pump antifreeze through the water lines, you may need to replace the antifreeze container. Don’t forget the outdoor shower.
Flush the toilet until antifreeze appears in the bowl. Introduce antifreeze into the drain lines and holding tank, so pour a cup of antifreeze in each drain and into the toilet bowl. Flush the toilet.
Turn the water pump off. Now open a faucet to release the pressure in the system. Go to the city water inlet valve. Remove the small screen and push on the valve with a screwdriver until antifreeze comes out. Replace the screen and close the inlet. Double check that the water heater’s heating element is switched off and that all faucets are closed.
STEP 6: THE BATTERIES
If your RV is going to sit in the cold for several months, removing the battery and bringing it indoors can extend the life of an auto battery and help it keep its charge.
Batteries should be stored in a warm, dry place, with something underneath them in case they leak (cardboard or any sort of mat works well). Some recommend using a battery maintainer to help the battery keep it charged.
RV WINTERIZATION COMPLETE
Now your RV is ready for winter!
While you are winterizing your RV, you may find some issues with your RV that need to be addressed. In the past, many RVers used RV repair shops almost exclusively unless their RV was disabled. These days, however, RV service centers are overburdened by the high number of RVs in need of repair.
In these cases, consider using a mobile mechanic for repairs. They may have a high service fee, but that service fee sometimes goes toward the cost of repairs. Plus, if you sign up with ARW, we cover mobile mechanic repairs along with any reasonable fees for service–regardless of whether or not your RV is inoperable.
 Copyright America's RV Warranty 2024 |